Step 2 - Cut the Sides
- Two pieces of 4' by 8' treated 3/4 inch plywood
This page was made before I created the String and Compass page, which describes this step better, I'm leaving these plans here so you can see both.
This is the step that will determine how tall your halfpipe will be. You can make it any height up to 4 feet (actually a max of 3' 6.5" feet since you start 5.5" off the ground). To cut the sides you use the string and compass method to trace the first side then use that piece to trace the three remaining sides.
The String and Compass Method
First off you want to make sure that you will be able to get two side pieces out of each piece of plywood. You might need to do a few trials to make sure where to draw the lines, how far into start depends on how high you decide to make your halfpipe.
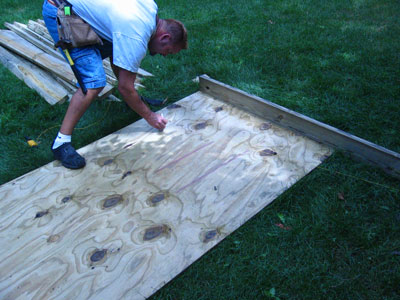
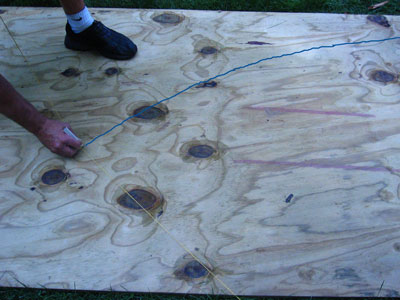
On average you will need to start about one foot into the piece of plywood. place a 2x6 vertical on top of the plywood (like shown in the picture above, except one foot into the plywood). measure 5.5" up from the bottom of the plywood and draw a dot, this is where you will start drawing the transition. You start 5.5" up so that the side is flush with the flat bottom you made last step.
Now you need to determine the transition of your halfpipe, for a mini pipe I would recommend about a 6' 10" transition. Starting from the dot you drew, measure up 6' 10" along the 2x6 you set on top of the plywood.
Next screw in a piece of string at this point, again the picture shows a 2x6 laying at the end of the plywood, but yours should be somewhere around one foot into the plywood.
Now tie the string around a pencil so that the pencil just reaches the dot you drew and trace the transition.
Do the same thing on the other side of the plywood to make sure that you can cut two sides out of one piece of plywood. It doesn't really matter how much plywood is left at the top, but it should be somewhere between 6" and 2 feet.
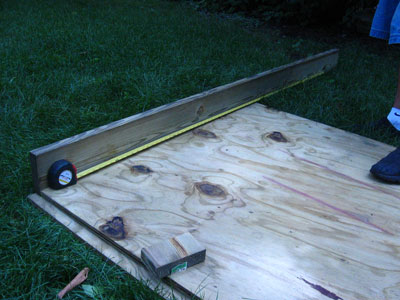
We made this halfpipe 2' 8" high, so we cut a piece 10" off the top of the plywood then drew the transitions, if you wanted a 3' 6" pipe, you would not cut anything.
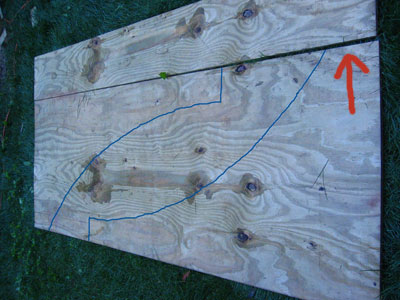
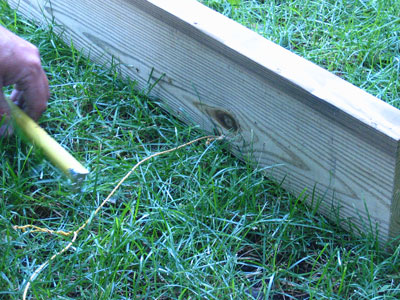
Again it is not important how much is left at the top (where the red arrow is drawn in the picture above) as long as it is more than 6"
It was not nessisary to cut the top of the plywood, but it saves wood and makes it so the tops are flat without having to cut again. We traced two lines to make sure that we would get two pieces out of the plywood.
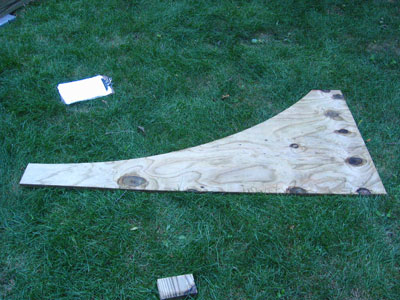
Next cut one of the sides and use that to trace the other three pieces. Now you should have three pieces that look like this.