Step 1 - Cut the Sides
<< Prev.......... Next >>Wood Required
- 1 Sheet 4'x8' (3/8)" plywood (non-treated)
Part 1: String and Compass
To Start off building your Funbox, first to decide how tall you want it to be and how steep you want the transitions going into it. Both of these factors will factor into the length of the funbox (the other factor is the length of the flat top). The plans that follow use a height of 2 feet and a transition of 8 feet (which works pretty well).
Its worth mentioning that you dont have to use curved transitions for the funbox like I am about to show, you can make the sides triangle shaped (a flat transition), if you decide to do that, this step is pretty self-explanatory.
Refer to the String and Compass method taught on this site. Start the transition 1.5 inches from the ground, make it two feet tall, use a 7 to 8 foot transition, and leave about 8 inches of flat on the side piece. You should end up with a piece that looks like this...
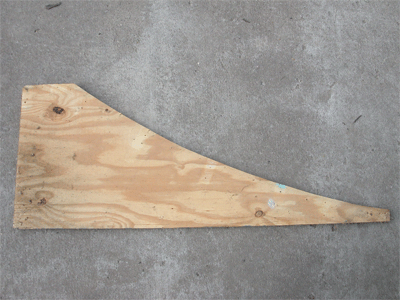
Notice that there is 8" of flat left at the top of the side, this is to ease the transition from the funbox transition the the flat top. I built the box in the middle to be 4' wide (to simplify plywood surfacing), so the total length of the flat top is 4' + 8" + 8" = 5'4", which is what I planned for, if you want to make your funbox have a longer flat top you can either adjust the size of the top you leave on the side pieces or adjust the length of the middle box.
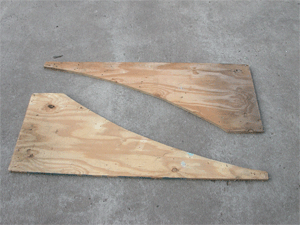
Part 2: Trace to Make Three More
This part is quite easy, instead of using the string and compass method again, just take the piece you have cut out and trace it to make 3 copies, you should be able to do it all on once piece of 4'x8' plywood with no problems. Now you should have this...
Thats it! You are on your way to a sick funbox